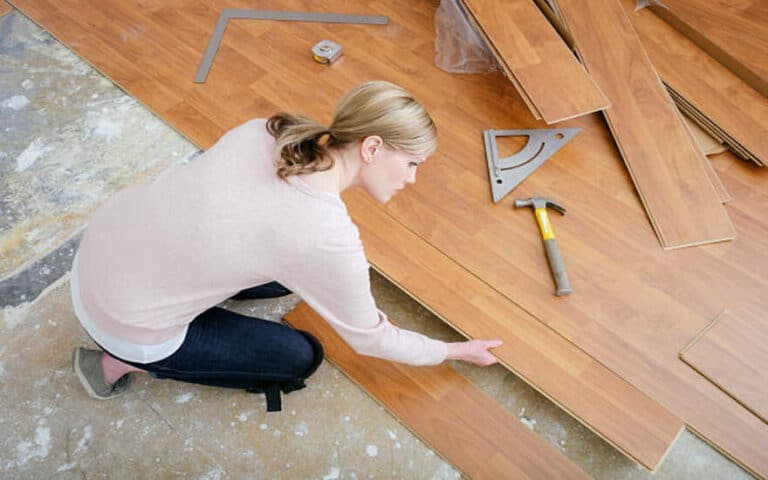
If you’re putting in laminate or vinyl plank flooring, it’s generally best to install the flooring before the cabinets. This is because these materials can be easily cut to size and fit around the base of the cabinets. However, if you’re planning to install tile flooring, it may be better to install the cabinets first. This is because it can be challenging to get a precise fit around the base of the cabinets if you’re working with tiles. As a result, installing the cabinets first can help minimize gaps between the tile and the cabinet base.
There are pros and cons to both approaches.
Pros of Installing Cabinets Before Flooring
If you install the cabinets first and then install the flooring, you may have less gap between the flooring and the bottom edges of the cabinets.
This can make the flooring look neater and give you more options for what type of flooring to put down. If you’ve already installed the cabinets, you may not get enough room to establish a more significant flooring type (such as an area rug) if you install the flooring after the cabinets.
If you install the cabinets first, you can also ensure they are nicely lined up and look as good as possible.
If you’re installing floating cabinets, this is particularly useful since floating cabinets aren’t as exact as wall-mounted cabinets.
Floating cabinets can also be easily leveled, which can be helpful if the flooring you’re installing is not level or very heavy.
Pros of Installing Flooring Before Cabinets
If you install the flooring first, you can get it fitted precisely to the cabinets’ underside. This can make the flooring look neater and make your cabinets cleaner.
You can also ensure the flooring is level before installing the cabinets. This way, you don’t have to worry about uneven cabinets. If you’re installing tile flooring, this is usually the best method.
Tile flooring can be difficult to cut around the cabinets and still look good. Installing the tile first makes installing the cabinets on top very easy.
If you’re installing hardwood flooring, this isn’t as important. Hardwood can often be cut to size, and you can get it to fit around the cabinets without too much difficulty.
Cons of Installing Cabinets Before Flooring
This method is generally acceptable for installing laminate or vinyl plank flooring. However, if you’re installing tile, it can be more difficult.
This is because tile is heavier and can put more pressure on the cabinets. Cabinets are generally made from particleboard, which can expand and contract with changes in humidity. Tile is usually very sensitive to changes in moisture, which means it can expand and contract much more than cabinets.
This means tile can cause the cabinets to expand and contract more, putting more pressure on their cabinets. If you install the cabinets and then put down the tile, you may notice the cabinets slowly sinking below the tile level.
This can be a problem since it can cause gaps between the tile and the tops of the cabinets. It can also make it harder to clean beneath the cabinets.
Cons of Installing Flooring Before Cabinets
If you install the flooring first, you may need to cut holes in the flooring for some of the cabinets. This can make the flooring look messy around these areas and make it harder to clean beneath the cabinets.
If you’re installing laminate or vinyl plank flooring, this may not be a problem. However, if you’re installing tile, you may have to cut larger holes, which can cause the tile to break and may create gaps between the tiles.
If you have a lot of cabinets, this can make the flooring around the cabinets look messy and make it harder to clean beneath the cabinets. Cabinets are generally reasonably heavy, and if you have a large or heavy cabinet at one end of the room, it can cause the flooring to bow out a bit at the other end of the room.
This can make it harder to get the flooring to line up perfectly since it can cause the flooring to be a bit uneven.
How do you install Ikea cabinets before new flooring?
1. Plan Your Layout Carefully
When installing Ikea cabinets, it’s essential to take the time to plan your layout carefully. This is especially important if you’re also installing new flooring, as you’ll need to account for the thickness of the flooring when determining where the cabinets will go. Once you have a clear idea of where the cabinets will be installed, you can begin measuring and marking the studs in the wall, so you know where to drill pilot holes for screws.
2. Start With The Lower Cabinets
It’s typically best to start with the lower cabinets when installing Ikea kitchen cabinets, as this will make it easier to install the upper cabinets later on. Begin by attaching the legs to the cabinet boxes using screws, then position them against the wall and use screws to secure them. Once the lower cabinets are installed, you can install the uppers.
3. Install The Upper Cabinets
Installing upper cabinets is similar to installing lower cabinets, but there are a few key differences. First, it’s often easiest to install upper cabinets by securing them in place temporarily using clamps before drilling pilot holes and connecting them with screws. Second, because upper cabinets are usually lighter than lower cabinets, you may need to provide additional support by screwing them into place from above using angled brackets or L-brackets.
4. Add The Hardware
After all of your Ikea kitchen cabinets are installed, it’s time to add any hardware, such as handles or knobs. Be sure to measure carefully so that your hardware is evenly spaced and positioned in a way that looks aesthetically pleasing. Once your hardware is in place, your kitchen renovation is officially complete!
How do you install Ikea cabinets after new flooring?
What You Need:
– Tape measure
– Level
– Pencil or pen
– Drill
– 1/8″ drill bit
– Hammer
– Nail set
– Finishing nails
– Cordless screwdriver or drill
– Philips head screwdriver bit
– Wood screws (1 1/4″ length)
– Cabinet hardware (knobs or handles)
Installation Steps:
1. Measure the width of the base cabinet opening and cut trim to fit using a miter saw. The frame will serve as a spacer between the new flooring and the bottom of the cabinet. It should be flush with the front edge of the cabinet and extend past the back edge by at least an inch.
2. Cut another piece of trim to fit along the back edge of the cabinet opening. This trim will also serve as a spacer and should be flush with both edges of the door. If necessary, use finishing nails to secure the frame in place.
3. Place the base cabinet into position, so it sits on top of the two trim pieces. Use a level to ensure that the cabinet is level from front to back and side to side, then use a pencil or pen to mark where the mounting holes line up with the studs in the wall behind it.
4. Remove the cabinet and predrill pilot holes for each mounting screw using a 1/8″ drill bit, then secure the cabinet to the wall using wood screws (1 1/4″ length). Be sure to drive each screw into a stud for maximum holding power. Repeat steps 3-4 for each remaining base cabinet until all are in place.
5. Hang any wall cabinets following steps 3-4, then install your cabinet hardware (knobs or handles). Congrats—you’re all done!
What are some tips for installing Ikea cabinets?
It would be best if you always ensured the cabinets are level before installing them. This means measuring the floor and ensuring the baseboard is level and all the walls are aligned.
It’s also a good idea to put a layer of polyethylene plastic between the wall and the baseboard to protect the wall from expanding and contracting.
When measuring your cabinets, you should measure from the floor up to the top of the cabinets. This is because if you measure the ceiling, you may end up with a gap between the cabinets and the roof.
If you want the cabinets to be level with the ceiling, you’ll need to measure up from the floor to the top of the cabinets and add an extra 1/2″ to account for the thickness of the baseboard.
If you’re planning to install tile flooring, it may be better to install the cabinets first. This is because it can be challenging to get a precise fit around the base of the cabinets if you’re working with tiles. As a result, installing the cabinets first can help minimize gaps between the tile and the cabinet base.
Summary
Installing Ikea cabinets before or after the flooring can be a good choice, depending on the materials you’re installing. If you’re putting down laminate or vinyl flooring, it’s usually better to install the cabinets first. If you’re installing tile, installing the flooring is generally better. Ideally, you should install the cabinets before the flooring if you’re installing laminate or vinyl flooring. And you should install the cabinets after the flooring if you’re installing tile. Make sure you consider these factors when planning and installing your cabinets to ensure they turn out as well as possible.

