If so, you’ve come to the right place. This blog post will explain the essential steps for installing and maintaining laminate flooring in bathrooms. I’ll also provide helpful tips for ensuring your bathroom floors look great for years to come. Let’s get started!
How to install laminate flooring in a bathroom: Step By Step
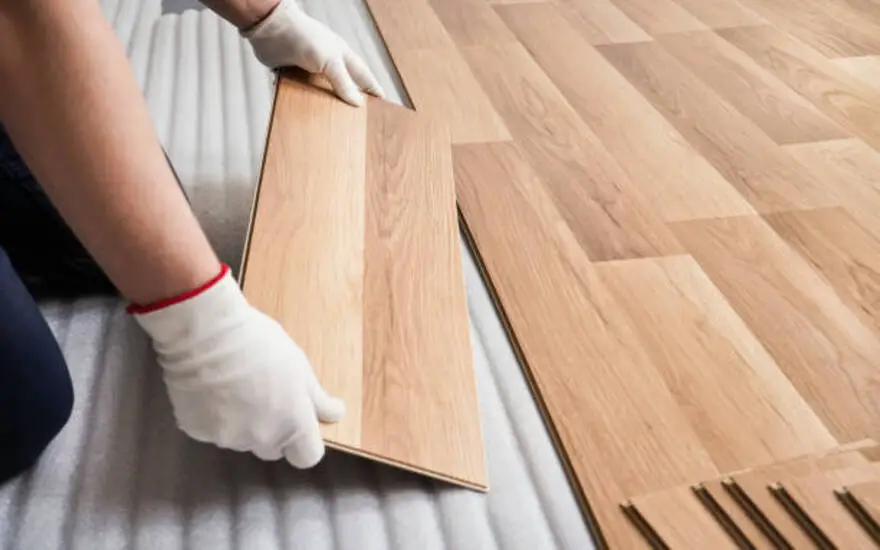
Now that you have all the necessary materials and instructions, it’s time to begin installing your laminate flooring in the bathroom. The first step is to prepare the bathroom for installation. Take a moment to make sure everything is level and that the subfloor is dry and clean before you start laying down the underlayment:
Step 1: Prepare the bathroom for installation
Before I begin installing my laminate flooring in the bathroom, I want to ensure I’m properly prepared. This means I must first for any signs of water damage in the subfloor or any other issues that could affect the installation.
I should remove the existing flooring and trim and take all necessary measurements before starting the installation process. Once I have everything ready, I’ll be able to move on to installing the underlayment and laying down the laminate planks with confidence.
Step 2: Install the underlayment
After preparing the bathroom for installation, it’s time to install the underlayment. This is a critical step in the laminate flooring installation process, as it helps protect your floor from moisture and noise.
There are a few different types of underlayment available, so make sure you choose the one that best suits your needs. Depending on your subfloor, you may need to use an adhesive to secure the underlayment to the subfloor.
For example, if you’re installing laminate flooring over concrete, you’ll need to use a two-in-one underlayment with an adhesive. Be sure to follow the manufacturer’s instructions carefully when inFollowrlayment and use a moisture barrier if necessary. Once you’ve installed the underlayment, you’re ready to lay the laminate planks on top of it!
Step 3: Lay the layer on top of the underlayment
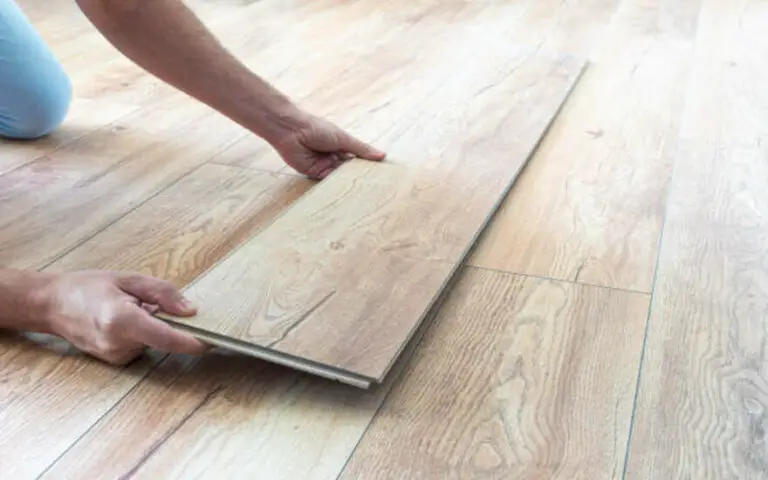
Now that the underlayment is in place, it’s time to start laying the laminate planks. Start at the corner of the room and work your way out. Make sure to keep the planks tight together and avoid any gaps. You can use a tapping block and a hammer to ensure that each plank is secure.
Make sure to leave a slight gap between walls and any other objects in the room to allow for the expansion of the planks. If you need to cut any planks, use a saw designed for laminate flooring.
Step 4: Cut and secure the planks
Once the planks are laid, the next step is to cut and secure them, so they fit snugly around pipes and other obstacles. To do this, a hole in the plank that is 1⁄2” larger than the pipe diameter cut the plank across the center of the circle.
Upon initial installation, silicone caulk is also recommended to protect your laminate flooring from water damage. I also suggest adding moldings and transitions to finish off the look of your laminate floor in the bathroom.
Step 5: Install moldings and transitions
Once you’ve successfully cut and secured all your planks, the next step is installing the moldings and transitions. For the moldings, you’ll ensure they fit snugly against the walls and corners of your bathroom.
To do this, measure the trim to the room’s walls and cut accordingly. It’s important to take your time with this step; if the moldings are off by just a tiny bit, it could throw off the entire look of your floor. Once you’ve got all the moldings in place, you can move on to the transitions.
Transitions are installed between two different types of flooring, such as laminate and tile. They give your floor a finished look and help ensure no gap between two different flooring materials. Installing transitions can be tricky, so it’s best to follow the manufacturer’s instructions for installation.
Step 6: Maintaining Laminate Flooring in a Bathroom
Now that you have successfully installed the laminate flooring in your bathroom, it is important to maintain it to ensure its longevity.
Regular cleaning and maintenance of your laminate flooring can help prevent dirt and moisture build-up, which can cause damage over time. To keep your laminate floor looking new, I recommend Title cleaner regularly and avoid abrasive cleaners.
Additionally, regularly mop up spills quickly to prevent water from seeping into any gaps or cracks. If you have any concerns about humidity or moisture in your bathroom, I recommend investing in a Pergo laminate floor for added protection. You can enjoy your newly installed laminate floor for years with the right care and maintenance.
The best ways to clean and maintain laminate flooring
Keeping your laminate flooring looking its best requires proper care and maintenance. Regular sweeping and dusting prevent dirt and debris from scratching or dulling the surface.
To keep your laminate floors looking great, I recommend damp mopping them with a mild cleaning fluid. Special laminate cleaning fluids are available, but any safe-Special laminate cleaning fluids abrasive cleaners as they may damage the surface of your floor.
When it comes to repairs or replacements, use the same type of laminate planks and follow the same process as the original flooring. It would be best if you also took extra precautions when dealing with humidity and moisture in a bathroom with laminate flooring. Ensure you have adequate ventilation and use a dehumidifier if necessary.
How to repair and replace damaged laminate flooring?
When repairing or replacing damaged laminate flooring, the above buckling problem is to uninstall the damaged planks and replace them with new ones.
To ensure a good match, I recommend dusting, sweeping, or vacuuming your laminate floors to remove loose dirt or debris before starting the installation process. Additionally, if you recently installed laminate floors, read our care, maintenance, and warranty guide to learn to keep your floors looking new and staying in top condition.
Donate gets worn down, and it will have to be replaced, so it’s worth your time and effort to keep your laminate flooring clean and free of dirt, dust, and other debris. Above all else, make sure you use a suitable color-matching repair kit for small scratches, cracks, and chips.
How to handle cuts and corners when installing laminate flooring?
When it comes to installing laminate flooring, cutting and cornering can be tricky. It’s important to ensure that you make clean, precise cuts and that your corners fit together properly. To help you get the job done, there are a few tips to bear in mind. Firstly, make sure your measurements are correct.
This will help you get a perfectly accurate cut. Secondly, don’t forget to use a jigsaw or miter saw for perfect angles and curves.
Thirdly, use a wood or a square as a guide when making straight cuts. Finally, you may also want to invest in an angled trimmer for precise corners and angles. With these tips in mind, you’ll be able to easily handle cuts and corners when installing laminate flooring in your bathroom!
How to install laminate flooring over radiant heat?
When installing laminate flooring over radiant heat, it is important to follow all installation guidelines and approved materials.
Quick-Step Laminate installation instructions 05/2021 recommend protecting the flooring from any radiant heat source. Additionally, it is important to use a floor-heating product that does not require adhesives to ensure the longevity of your laminate flooring.
Furthermore, it is essential to use a moisture meter or concrete moisture test kit before installing laminate flooring to determine how wet or dry your floor is. Finally, remember to maintain good expansion joints when laying laminates on top of parquet floors.
How to handle humidity and moisture in a bathroom with laminate flooring?
I must be extra careful when handling humidity and moisture in my bathroom with laminate flooring. The subfloor should be checked for moisture content, and it should be kept within a certain range.
To prevent water damage, I must use a waterproof silicone caulk when installing the laminate. Regular sweeping and dust-mopping are important for maintenance, but I should also use an underlayment with a vapor barrier to protect against humidity.
It’s also important to check for dampness or mold, which can cause structural and health problems if left unchecked. With these steps, I can ensure that my bathroom’s laminate flooring will remain intact despite the humidity and moisture.
Summary
In conclusion, installing and maintaining laminate flooring in your bathroom can be a great way to get the look and feel of real wood without the added cost. With a few simple steps and regular maintenance, you can enjoy a beautiful, durable floor for years to come.
From preparing the bathroom for installation to replacing damaged planks, this guide provides all the information you need to successfully install and maintain laminate flooring in your bathroom. With these tips and tricks, you can have a beautiful and long-lasting laminate floor in no time!


