If you’re looking for a way to install laminate flooring without breaking the bank, look no further. In this blog post, I’ll show you how to cut laminate flooring without a cutter – saving you time and money! So if you’re ready to start your next DIY project, keep reading for all the tips and tricks.
How do you cut laminate flooring without a cutter: 10 Do’s
Cutting laminate flooring without a cutter can be tricky, but it can be done easily with the right tools and know-howy. To get the job done right, start by measuring and marking the area that needs to be cut. Then use a utility knife or saw to score the laminate in the desired shape. Once the line is achieved, use a hammer and chisel to cut through the laminate.
1. Make sure you measure and mark the area that needs to be cut
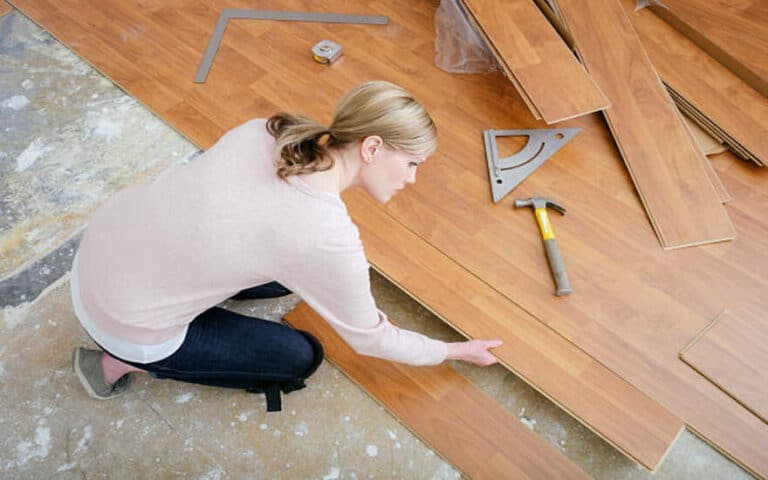
Before you start cutting your laminate flooring, measuring and keeping the area that needs to be missed is essential. This will help ensure that you get a precise cut. Take your time and make sure that your measurements are accurate.
Once you have measured and marked the area, you can begin cutting the pieces. Make sure to use a straight edge to guide your cuts for accuracy. Taking the extra time to measure and mark will help ensure your flooring looks perfect when installed.
2. Use a utility knife or saw to score the laminate in the desired shape
Before you can make any cuts to your laminate flooring, it’s essential to scratch the surface first. This will help you get a cleaner and more precise amount. The best tool for this is a utility knife or saw. All you have to do is mark the area that needs to be cut and then use the knife or saw to create a grooved line in the laminate.
This will give you a good starting point for your cut and help ensure it’s even and accurate. It may take some practice, but scoring the laminate before cutting will make all the difference once you get the hang of it.
3. Cut through the scored line with a hammer and chisel
Cutting through laminate flooring with a hammer and chisel can be tricky, but it can be done with patience and practice. To start, ensure you have the right tools. A hammer with a chisel with a sharp, pointed edge is best. Place the chisel at the end of the score line, then strike the chisel with the hammer.
This will help to create an indentation in the laminate that will make it easier to cut. Once you have an indentation, keep striking the chisel steadily until you’ve cut through the line. Wear protective gear like gloves and eye protection when doing this!
4. File down any rough edges with a file or sandpaper
Once the laminate has been cut to the desired shape, it’s essential to file any rough edges with a file or sandpaper. This will ensure a clean and professional finish. Sanding the edges will also help prevent chipping when applying the laminate.
It will also ensure the pieces fit together perfectly and create a seamless look. Taking the extra step to file down any rough edges will ensure that your laminate flooring looks beautiful and lasts many years.
5. Secure the pieces together with wood glue and clamps
Once you have measured and marked the area you need to cut, scored the laminate with a utility knife or saw, and cut through the scored line with a hammer and chisel, it’s time to secure the pieces together.
I recommend using wood glue and clamps for this step. This will ensure that your pieces are held tightly together while you cut them into strips using an electric saw or create more intricate shapes with a jigsaw.
Once you have completed these steps, you can drill holes into the laminate for outlets and switches, make grooves with a router, and even bend the laminate into curved shapes with a heat gun. Secure your pieces before these other steps to ensure your flooring looks perfect!
6. Use an electric saw to cut the laminate into strips
Cutting laminate planks into strips is easy when you have the right tools. An electric saw is a perfect tool for cutting your laminate into strips quickly and accurately. When using an electric saw, make sure always to use safety glasses and hearing protection, as well as a dust mask.
I find that it’s best to cut with the décor side of the plank facing up, as this allows for a cleaner cut. I also recommend using a jigsaw to make more intricate cuts, such as around outlets or switches. With these tips, you can easily create perfect laminate strips for your flooring project!
7. Use a jigsaw to create more intricate shapes
I love using a jigsaw to create more intricate shapes in my laminate flooring. It’s a great tool when cutting around objects like toilets or other fixtures. It’s also perfect for creating more complicated shapes and designs in the laminate. This is especially helpful when looking for something more unique than a straight cut.
I find that using a jigsaw is much easier and faster than using a handsaw or crosscut saw, and it also helps prevent chipping or cracking off the laminate. Plus, it adds a lovely touch to the finished product!
8. Drill holes into the laminate for outlets and switches
When cutting laminate flooring, drilling holes for outlets and controls is necessary. It’s essential to ensure you have the right tools, such as a drill with a counter sink bit and a spade bit for the outlets. Make sure you measure and mark the area accurately before drilling so that you don’t damage the laminate.
If you have access to a router, you can use this to make grooves in the laminate for a more professional finish. If not, use a jigsaw or saw to carefully cut around the outlets and switches while holding the laminate steady with clamps.
9. Use a router to make grooves in the laminate
Using a router to make grooves in the laminate can be a great way to create intricate shapes and designs. Choosing the right bit for the job is essential when using a router. A fixed tip guide will ensure your cuts are safe and don’t cut too deep.
Make sure to wear safety glasses when routing and to use earplugs if necessary. As you route, take your time and pay attention to the cuts you are making. You can create beautiful, intricate designs in your laminate flooring with patience and practice.
10. Use a heat gun to bend the laminate into curved shapes
A heat gun is a perfect tool to make curved shapes or angles with your laminate flooring. You can easily bend the laminate using a heat gun in whatever form you desire. It’s essential to be careful when using the heat gun, as it can potentially cause damage to the laminate if misused.
You can easily create curved shapes by keeping a constant distance from the laminate and moving the heat gun in a circular motion. Once you’ve bent the laminate into the desired shape, allow it to cool, and then use a jigsaw to fine-tune any details.
Can you cut laminate flooring without chipping it?
Cutting laminate flooring without chipping it can be tricky, but it is possible with the right tools and techniques. When cutting laminate flooring, using a sharp blade designed for the material, such as a carbide-tipped blade is essential.
Make sure to cut slowly and carefully to ensure accuracy, and use a straight edge to guide the saw. Using a power saw, use low-speed settings and make shallow passes. Additionally, you can use masking tape on the top of the board to help prevent chipping.
Finally, it is best to do so face down when cutting laminate flooring up or down, as this will minimize chipping. With these tips in mind, you should be able to cut your laminate flooring without any chipping or damage.
Do you cut laminate flooring face up or down?
When cutting laminate flooring, it’s important to consider which direction you should be missing. Generally, it would be best to cut the laminate flooring face down. This helps to prevent chipping, splintering, and other damage that can occur when cutting face up. It also helps to make sure that the cuts are smooth and even.
If you need to cut laminate flooring face up, then be sure to use a high-quality jigsaw blade and make sure the knife is sharp. Use a piece of scrap wood or cardboard underneath the laminate to prevent chipping. It’s also a good idea to use a saw with a variable speed setting to adjust the speed based on the thickness of the material you’re cutting.
Are you interested in cutting pliers?
Cutting pliers are an excellent tool for cutting laminate flooring! Not only do they provide a precise cut, but they also make it easy to handle the material without worrying about the pieces slipping or chipping. The blades of the pliers are designed to fit into tight spaces and allow for tight turns so that you can easily create intricate shapes and patterns.
They also provide a secure grip on the material, so you won’t have to worry about slipping or shifting during use. Plus, since they are made of solid metal, they are durable enough to last for many years of service. So if you’re looking for a convenient and efficient way to cut your laminate flooring, cutting pliers may be just what you need!
Summary
Cutting laminate flooring without a cutter can be done using several household tools, including a handsaw, a utility knife, or a circular saw. A handsaw can make straight cuts, while a utility knife can score the laminate along a straight line and snap it. A circular saw can also be used but may produce rough cuts.
To make a clean and accurate cut, it is recommended to use a proper laminate flooring cutter, which can be rented or purchased. When cutting laminate flooring, it is important to use a straight edge as a guide to ensure straight cuts. Also, wear protective gear, such as safety glasses and gloves, to avoid injury.

