Installing laminate flooring is a great way to update the look of your home, but if you don’t know how to cut it correctly, you could end up with an uneven finish. I’m here to help! In this blog post, I’ll show you how to cut laminate flooring cleanly and accurately so that your floors look perfect.
How Do You Cut Laminate Flooring Cleanly – Step by step
Cutting laminate flooring correctly ensures your floors look great and last long. The process of cutting laminate flooring can be daunting, but with the right tools and techniques, it doesn’t have to be.
Step 1: Prepare the Laminate Flooring for Cutting
Before you start cutting your laminate flooring, it’s important to make sure everything is prepared and in the right place. First, make sure the laminate is laid out on a clean, flat surface. Next, mark the cut line with a pencil or other marking tool.
Finally, find a saw that will work for the job – utility knives are not suitable for cutting laminate flooring. Once you have all these in place, you can cut the laminate flooring.
Step 2: Mark the Cut Line
Before cutting your laminate flooring, it’s important to mark the cut line accurately. The best way to do this is to use a chalk line or a pencil to mark the spot where you will cut clearly. This will ensure that the amount is as precise and straight as possible.
Once your line is marked, use a straight edge to double-check that it is correct, and then you are ready to cut. By taking your time and following these simple steps, you can ensure that your laminate flooring will be cut cleanly and accurately.
Step 3: Set up the Saw and Cut the Laminate Flooring
Step 3 is time to set up the saw and cut the laminate flooring. It’s essential to select the right tool for the job.
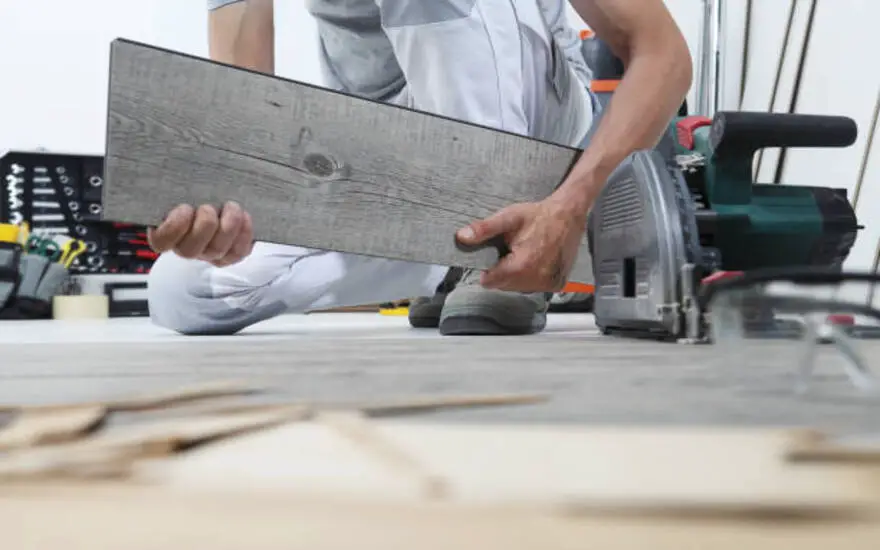
For simple straight cuts, you can easily use a handsaw. If you don’t have one, a jigsaw or coping saw can also be used. The best way to cut flooring is with a laminate floor cutter, jigsaw, and crosscut (or a table saw).
Make sure to set the depth of your saw blade a tad deeper than the thickness of the laminate flooring before cutting, and always make sure to cut downwards into it with the décor side facing upwards. Once you’ve scored your plank with a utility knife and cut out any center sections with a circular saw, your plank will be ready to go.
Step 4: File or Sand the Cut Edge for a Smoother Finish
Once you’ve cut your laminate flooring, it’s time to smooth the edges for a clean finish. To do this, you’ll need to use a file or orbital sander.
I like to attach 120-grit carbide sandpaper to an orbital sander and hold it at a 45-degree angle pointing down toward the ground. This will ensure that rough edges are sanded down and the cut is as smooth as possible.
It would be best if you also were sure to support the laminate while sanding or filing so that it doesn’t break. Your floor should have a neat and clean edge when you’re finished.
7 Don’s For Cut Laminate Flooring Cleanly
When cutting laminate flooring, you should keep some essential don’ts in mind.
1. Don’t use a utility knife
A utility knife is not the way to go when cutting laminate flooring. Although it may seem easy and quick to get the job done, it’s not the most accurate method and can leave you with jagged edges.
It’s best to use specialized tools such as a laminate floor cutter, jigsaw, or crosscut saw for a clean, professional finish. Not only will they give you better results, but they will also be much safer to work with than a utility knife.
2. Don’t cut without a guide
Cutting laminate flooring without a guide is a recipe for disaster! Making the precise cut you need will be more challenging but can also lead to uneven edges and a sloppy finish. A cutting guide can help you create straight, accurate cuts that look great and fit perfectly.
Take measurements of the space where you’ll be placing the laminate flooring and make a cutting guide out of the same material as your laminate. This will ensure that all your cuts are precise and help you avoid any mistakes that could ruin your flooring.
3. Don’t use a circular saw
When cutting laminate flooring, a circular saw should be avoided. The circular saw is too powerful and can easily damage the laminate flooring. It is also difficult to control, so it’s essential to ensure the cut is precise.
Additionally, the circular saw can splinter the laminate, making it difficult to get a clean finish. Instead, use a handsaw or jigsaw for straight cuts or a plunge saw for curved cuts. These tools are easier to control and will give you a much cleaner cut.
4. Don’t force the saw blade through the laminate
When cutting laminate flooring, it’s essential to be gentle and not force the saw blade through the material. Doing so can cause the laminate flooring to crack or break, making installation difficult.
Instead, take your time and smoothly guide the saw blade in one smooth motion. This will ensure a cleaner cut and help you avoid damaging the laminate flooring.
5. Don’t forget to support the laminate as you cut
One of the most important things to remember when cutting laminate flooring is to ensure you have enough support for the boards as you miss them. Without adequate permission, the panels can shift, resulting in an uneven cut. Using a clamp or vice is best to keep the board secure while you make your cut.
This will help ensure you get a clean, accurate cut every time. Additionally, ensure that the clamps or vice you use is non-marking so you don’t damage the laminate flooring. With some preparation and planning, you can ensure that your laminate flooring cuts come out perfectly every time.
6. Don’t cut too close to the wall or door frames
When cutting laminate flooring, it’s essential to ensure you’re not missing too close to any walls or door frames. If you do, you risk damaging the walls and structures when installing the flooring.
To avoid this, measure at least two inches from the wall and door frames before making your cut. This will ensure that there is enough room for expansion and contraction once the flooring is installed.
Use a level to ensure that your cuts are accurate and precise. Following these simple steps, you can keep your walls and door frames safe while ensuring a perfect fit for your new laminate floor.
7. Don’t make multiple passes with the saw blade
When cutting laminate flooring, one of the most important things to remember is not to make multiple passes with the saw blade.
Doing so will leave you with an uneven cut and could cause damage to the laminate. Instead, use a single, even pass when cutting through the flooring. This will ensure you have a clean, smooth cut that looks professional and will last for years.
Summary
Cutting laminate flooring is not as difficult as it may seem. With the right tools, technique, and preparation, you can quickly achieve a clean and precise cut. It’s important to remember to wear eye and ear protection when cutting laminate flooring, mark the cut line clearly and use a saw that is suitable for the job.
Support the laminate while cutting it, and avoid making multiple passes with the saw blade. If you stick to these guidelines, you can cut your laminate flooring cleanly and efficiently.

