In this blog post, I’ll explore how to measure and plan for your bathroom flooring installation so that you can get the perfect look for your space. Read on to find out more!

How to measure and plan for bathroom flooring installation: Step-By-Step
This way, you can determine the square footage of the room where you intend to install the flooring. Measure the length and width of the space using a tape measure. You should also snap chalk lines on the floor to find the midpoint of each wall and then draw a line crossing at the room’s center. This will be the starting point of your tile installation.
1. Measure the Dimensions of the Room
Now that you have a general idea of the room’s layout, it’s time to measure its dimensions. This is an important step as it will let you know how much flooring you need. Start by measuring the length and width of the room. Use a tape measure to determine the length and width for square or rectangular rooms.
Then multiply the length by the width to get your square footage. If your room isn’t rectangular, we recommend splitting it into rectangular sections. Multiply the width and length of each rectangle together to find the area.
Once you have your measurements, you can determine how much flooring you will need for installation.
2. Find Something to Go Off Of
Once you have measured the room’s dimensions, you need to find something to go off of. This can be a wall in the middle of the room or a corner. Find the midpoint of each wall and snap chalk lines on the floor.
The line crossing at the room’s center isis the tile’s starting point. When laying out your tile pattern, you can use this as a point of reference. Lay a row of field tiles from one end of the room to the other, and ensure each tile is level and square with the chalk lines.
Make adjustments as needed and keep testing the layout until you find something that works.
3. Draw or Print a Photo of the Space
Once you’ve measured the room’s dimensions and have something to go off of, the next step is to draw or print a photo of the space.
This will help you visualize where the walls, fixtures, and other elements are located, as well as what the layout and size of the bathroom will be. To ensure accuracy, you can use a ruler and graph paper or a computer program like AutoCAD to draw a diagram to scale.
Additionally, it’s important to note any special features or accessibility considerations when drawing out your plan. Once you’ve got your floor plan drawn out, you’ll be ready to figure out the square footage of each room.
4. Figure Out the Square Footage of Each Room
Now that you have the room’s dimensions and a plan in mind, it’s time to figure out the square footage of each room. This will help you determine how much flooring material you need to purchase.
To do this, multiply the length of the room by the width. For example, if your bathroom is 10 feet long and 10 feet wide, it will have an area of 100 square feet. It’s important to note that if your bathroom is not a perfect rectangle, you need to break it up into sections and calculate the square footage for each one before adding them up.
Doing this will ensure you don’t overestimate or underestimate how much material you need.
5. Snap Chalk Lines on the Floor
Snapping chalk lines on the floor is crucial before starting your bathroom flooring installation. This will help you create an even layout of your tiles when you start laying them out. Start by measuring the room and finding the center point.
Then, use a chalk line to draw a straight line between the two marks. Ensure the chalk line is at a 90-degree angle for an accurate layout. This will ensure that the tiles are even and symmetrical when installing them.
6. Test the Layout for the Tile Installation
After you have measured the room’s dimensions, it is important to test the layout for the tile installation.
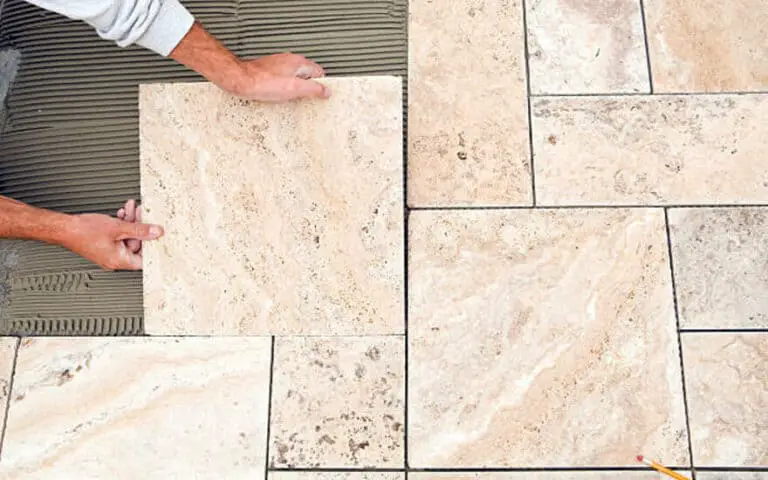
Dry laying the tiles on the floor lets you know what the final layout will be. You can measure and mark a starting position and then place a single half row of floor tiles in both directions. This will ensure that your tile pattern matches correctly and that the tiles are evenly spaced.
It is also important to consider your waste factor, which will depend upon the size, configuration, and pattern of your tile installation. Once you have tested the layout, you can install a full row of tiles and make any necessary adjustments. After that, you can finish the installation and grout and seal your tile floor.
7. Lay a Single Half Row of Floor Tiles in Both Directions
After finding the center of the room, it is time to lay a single half-row of floor tiles in both directions without mortar.
This ensures consistent joints and accurate measurements when laying the tiles. To do this, lay a row of tiles along a straightedge more than halfway across the room, and use tile spacers between each tile for precise measurement.
Once the half rows are laid, it’s time to look at where your cuts will be and adjust the layout accordingly. This will prevent you from ending up with a small cut piece slowly getting wider along one side of your room.
8. Place a Full Row of Tiles and Make Adjustments as Needed
After you’ve completed the half-row installation, it’s time to place the full row of tiles. Start by laying the tiles from the center of the room and working outward.
This will help you ensure that the edges of the tile are even along the walls. Make any adjustments needed to keep your tiles in line as you work. Once you’ve placed all the tiles, double-check that everything is lined up and spaced correctly.
9. Finish Installing Your Floor Tiles
After laying a single half row of floor tiles in both directions, placing a full row of tiles, and making adjustments as needed, you can finish the installation. Use spacers to ensure you maintain a uniform grout line size.
Measure the diagonals of your tile layout to ensure everything is square. Once your tiles are laid, remove the spacers and start setting the grout in between the tiles. Grout helps give the tile a finished look and keeps it in place.
After grouting, the final step is to seal your tile floor. Sealing your tile will help protect it from water damage, and dirt build-up, making it easier to clean.
10. Grout and Seal Your Tile Floor
Once you have finished installing your floor tiles, it is important to grout and seal them properly. To grout, the tiles, use a wet tile saw to cut the grout line and apply the grout with a rubber float held at a 45-degree angle.
Make sure to wipe off any excess grout with a damp cloth or sponge. Finally, seal the grout with a sealant of your choice for durability and stain protection. With these steps, you will have successfully measured and planned for your bathroom flooring installation!
Is it necessary to lower the toilet flange?
When installing a new bathroom floor, it is important to consider the height of the toilet flange. The flange should be flush with the finished floor to accommodate the toilet properly. If the hole in the floor is too small for the flange to fit, you may need to enlarge it by tracing around the flange and cutting it with a reciprocating saw.
Additionally, it is important to measure from the wall and not from the baseboard when determining where to place the flange. Finally, consult local plumbing codes and licensing requirements before installing your flooring.
How to tile a bathroom floor for beginners?
Tiling a bathroom floor can be a daunting task for beginners, but with the right preparation and tools, it can be done easily. Before you start tiling, it’s important to measure and plan the layout of your bathroom floor correctly.
First, measure the room’s dimensions and then determine each room’s square footage. Next, snap chalk lines on the floor and test the layout for the tile installation. Once your layout is set, you can start laying tiles in a single half-row in both directions. Then place a full row of tiles and make adjustments as needed.
Once all the tiles are installed, you can grout and seal them to finish your project. It is also important to consider if it is necessary to lower the toilet flange before tiling your bathroom floor. With these steps in mind, you can easily tile a bathroom floor like a pro!
How is floor size calculated?
Once you have all your measurements and drawings, it’s time to calculate the floor size. To calculate the square footage of a room, multiply the length by the width. For instance, a room measuring 12′ x 36′ is 432 square feet.
If your room is round or irregular, divide the total length you’ve measured in inches by 2 to find the radius. Then, add the total feet you’ve measured and divide by 12 to get the inches in your measurement. These totals will be your width and length. From here, multiply the width and length to get your total square footage.
Summary
Installing bathroom floor tile is a do-it-yourself project that you can tackle with the right tools, measurements, and planning. To ensure your project’s success, accurately measure your room’s dimensions and figure out each room’s square footage.
Then, snap chalk lines on the floor to help you lay out the tiles in a neat pattern. Before laying down tiles, test the layout for a tile installation. Then, begin installing your floor tiles, starting with a single half-row in both directions. Place a full row of tiles and make adjustments as needed and once you’re done, grout and seal your tile floor.



![How To Cut Laminate Flooring Lengthwise [Easy Guide] 7 How To Cut Laminate Flooring Lengthwise [Easy Guide]](https://homequeries.com/wp-content/uploads/2023/02/istockphoto-1162520121-612x612_880x550-768x480.jpg)