Luxury vinyl tile (LVT) and plank (LVP) flooring are cost-effective, durable, and beautiful options that can be installed in any bathroom. In this blog post, I’ll give you all the information you need to install and maintain LVT and LVP flooring in your bathroom. Let’s get started!
LVT and LVP Flooring in Your Bathroom Step By Step
Step 1: Prepare the Subfloor
Now that you know how to prepare the subfloor, it’s time to measure and cut the vinyl flooring. It’s important to ensure that the vinyl is cut to the right size and shape to be laid correctly.
If you’re unsure how to do this, our guide provides step-by-step instructions to make it as easy as possible. With a few simple steps, you’ll be ready to install your luxury vinyl tile or plank flooring in no time!
Step 2: Measure and Cut the Vinyl Flooring
Now it’s time for Step 2: measuring and cutting the vinyl flooring. Before you start, measure the room’s length, then divide it by the length of the luxury vinyl planks or tiles you’re using.
This will help ensure that you have enough material to cover the entire area. Once you have your measurements, cut the vinyl planks or tiles to size and get ready to install them!
Step 3: Install the Vinyl Flooring
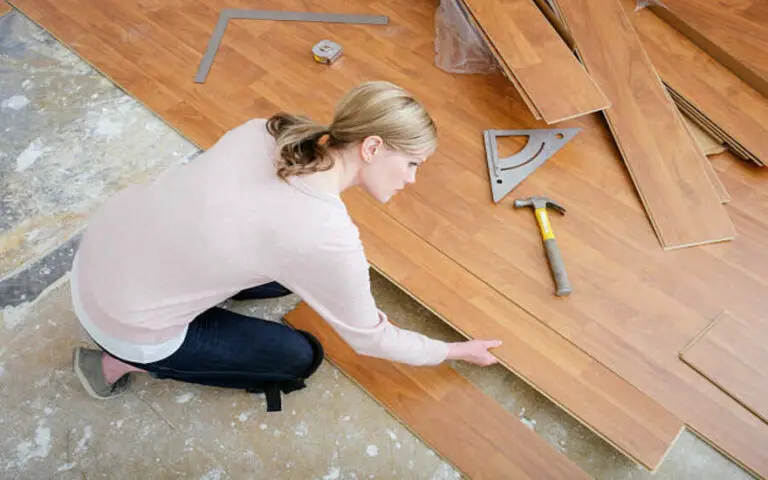
Now that you have your vinyl flooring measured and cut, it’s time to install it. The DIY crowd will benefit the most from LVT and LVP floor coverings; they are one of the fastest and easiest floors to install.
To ensure a successful installation, ensure that you have properly prepared the subfloor, and you may need to place a moisture barrier for vinyl plank flooring if you’re using glue to install them. Start by laying out the planks in the room and make any necessary adjustments.
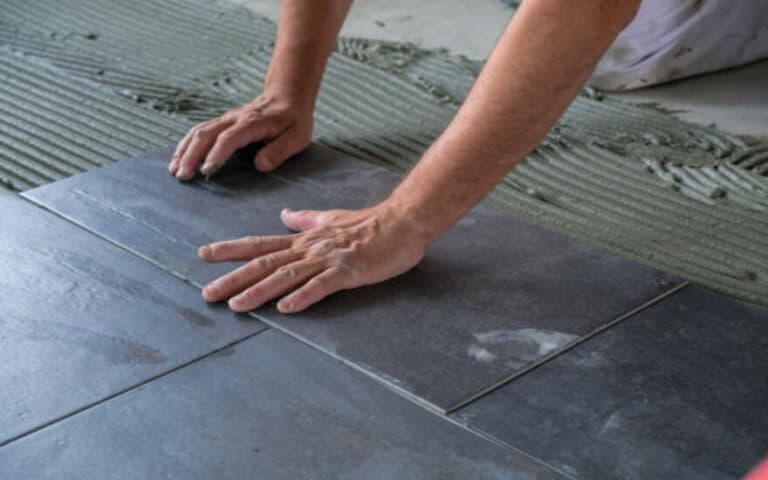
You can use a tapping block and a hammer to connect the planks and then use spacers to keep them in place. If you’re installing luxury vinyl tile, use a trowel to spread adhesive before laying down each tile.
After the installation is complete, clean away any excess adhesive and allow your new floor to dry completely before enjoying it.
Step 4: Maintain Your New Vinyl Bathroom Flooring
Once you have installed your new vinyl bathroom flooring (LVT or LVP), it is important to maintain it properly to ensure that it lasts for years. Maintenance for vinyl plank flooring is fairly inexpensive, and you can use any commercial cleaners recommended for vinyl floors or craft some DIY cleaners.
Customers call our office daily with questions about cleaning, sealing, and making their LVT floors safer against slip and fall accidents. So, if you take the time to periodically clean and maintain your vinyl bathroom flooring, you can be sure that your floors will remain beautiful and safe for years to come.
The best ways to clean and maintain vinyl bathroom flooring (LVT and LVP)
The best way to keep your LVT and LVP flooring looking its best are to clean it regularly and properly. Damp-mop weekly with a mild, non-abrasive floor cleaner and a microfiber mop. Vacuum or dry mop the floor daily to remove dust, hair, and dirt.
Avoid using ammonia-based cleaning solutions or highly abrasive scrubbers or detergents on your vinyl flooring, as this can cause damage. If you need a deeper clean, you can use a cup of apple cider or white vinegar in a gallon of hot water. Cleaning and maintaining your vinyl bathroom flooring (LVT and LVP) is easy if done regularly and correctly.
1. The basics of cleaning LVT and LVP flooring
I’m sure you are familiar with the basics of cleaning LVT and LVP flooring, such as dry mopping or vacuuming daily to remove grit, using a cup of apple cider or white vinegar in a gallon of hot water as one of the best vinyl plank flooring cleaners, dampening your mop, using a non-abrasive, “no-rinse” floor cleaner, avoiding soap-based detergents and regularly maintaining your new floors with light cleaning.
Sweep your vinyl daily or use a vacuum to keep debris off the floors, and use commercial vinyl floor cleaners or mix apple cider vinegar with water to make a simple and effective cleaner.
Most standard flooring cleaning tools are suitable for LVT floors, so when you want to disinfect your floors or do a deeper cleaning, you can mix your gentle solution using some general household products.
Lightly apply a layer of properly diluted Armstrong Flooring Once ‘n Done Resilient & Ceramic Floor Cleaner, and you’ll be able to keep your Tarkett Luxury Flooring looking its best.
What to use when cleaning LVT and LVP flooring?
When cleaning LVT and LVP flooring, the best thing to use is a cup of apple cider or white vinegar mixed with one gallon of hot water. Dampen your mop in the solution, and then mop the floors to remove dirt and grime without leaving any residue.
You can also use commercial vinyl floor cleaners, but follow the instructions on the label. Additionally, you should never use harsh chemicals or abrasive cleaners on your vinyl flooring as they could discolor or damage the surface.
1. Cleaning tips for LVT and LVP flooring in the bathroom
When cleaning LVT and LVP flooring in the bathroom, it’s important to remember that these floorings require a bit more attention than other materials. For best results, vacuum or dry the floor daily to remove dust and grit, and use a damp mop and a cleaning solution every week or so.
Apple cider vinegar is a great cleaner for vinyl flooring and safely removes dirt and grime without leaving behind a residue. Soap should be avoided as it can leave behind a film that collects dirt. Use a neutral cleaner to break down dirt on the surface for stubborn stains. And when you need to do a deep clean, be sure to use water on your mop, as soap can damage LVT and LVP flooring.
2. Maintenance tips for LVT and LVP bathroom flooring
To keep your LVT and LVP bathroom flooring looking their best and lasting longer, it’s important to maintain them properly. I recommend regularly vacuuming or dry mopping the floor to remove dust, dirt, and hair and then using a damp mop and a cleaning solution to do a deeper cleaning.
Neutral cleaners are best for breaking down dirt on the surface and removing stubborn stains. For disinfecting, you can use a mixture of one cup of apple cider or white vinegar in a gallon of hot water.
Rejuvenate Luxury Vinyl Floor Cleaner is also an effective product for cleaning and maintaining vinyl floors, as it has a pH-balanced formula that won’t damage the finish.
How do you repair and replace damaged vinyl bathroom flooring (LVT and LVP)?
When it comes to repairing and replacing damaged vinyl bathroom flooring, such as LVT and LVP, it’s important to take the right steps to ensure that the job is done properly. Depending on the extent of the damage, you may need to replace the entire plank or tile or repair the damaged area.
Before you begin any repairs or replacements, preparing correctly and having all the necessary materials on hand is essential. After that, you’ll need to remove the old flooring and install the new one. Lastly, proper maintenance is key for keeping your vinyl floors looking new for years to come.
1. Preparing for Repair and Replacement
Before replacing our damaged vinyl bathroom flooring, we must take a few steps to prepare for the repair. We should start by finding the wall closest to the damaged plank and measuring the height of the new vinyl flooring against the existing tiles.
Self-leveling products can also be used to fix low spots; high spots should be sanded or ground down. It is also necessary to ensure that the subfloor is properly adhered to and smooth so that our luxury vinyl tiles (LVT) or planks (LVP) can be installed correctly.
With the right preparation, our LVT or LVP flooring will look beautiful and last for years!
2. Removing Old LVT/LVP Flooring
Having prepared the subfloor and measured and cut the new vinyl flooring, it’s time to remove the old LVT/LVP flooring. Carefully lift one corner of the vinyl plank or tile, and peel it away from the adhesive.
You may need to use a putty knife or other tool to gently pry it away from the subfloor. Once you’ve successfully removed one piece, you can continue peeling off the rest of the flooring. Be sure to dispose of it properly – it can be recycled in most cases.
3. Installing New Flooring
Once the old flooring has been removed, it’s time to install the new LVT or LVP vinyl flooring. The installation process is relatively simple and can be done in four steps: prepping the subfloor, measuring and cutting the vinyl flooring, laying the vinyl flooring, and securing it.
Make sure to read the manufacturer’s instructions carefully before beginning. Start installing the new vinyl flooring from one corner of the room and work your way out. Use a rubber mallet to ensure that each tile or plank is securely locked. Once complete, you’ll have a beautiful new LVT or LVP bathroom floor that you can enjoy for years to come!
4. Maintaining Vinyl Bathroom Flooring
Maintaining your vinyl bathroom flooring is essential to keep it looking great for decades. It’s important to regularly clean and care for your LVT and LVP flooring to ensure that it remains in optimal condition.
Certain cleaning products and methods are best suited for vinyl flooring, as with any flooring. We’ll discuss the basics of cleaning and maintaining LVT and LVP flooring in the bathroom and some tips on repairing or replacing it if necessary.
Summary
In summary, installing and maintaining LVT and LVP flooring in your bathroom is relatively easy. It is an affordable option with great water resistance and is easy to clean and maintain.
Preparation for repair and replacement involves removing the old flooring and installing the new flooring. Cleaning and maintenance tips should be followed to ensure your vinyl bathroom flooring remains in top condition for years to come. You can enjoy a beautiful, durable, and long-lasting vinyl bathroom floor with proper care.

