Replacing your bathroom floor vinyl is a great way to give it a fresh look and add some new style. This blog post will walk you through exactly how to do it. Read on to learn more!
Gather Materials
Before replacing your bathroom floor vinyl, you’ll need to gather all the necessary materials. These materials include a notched trowel, pry bar, push broom, the roll of vinyl flooring, and any other items you’ll need to complete the job.
Measure the area you’re replacing to ensure you purchase enough vinyl flooring. Additionally, you’ll need to remove any existing baseboard trim using the pry bar. Once you have all your materials, you can remove the old vinyl flooring.
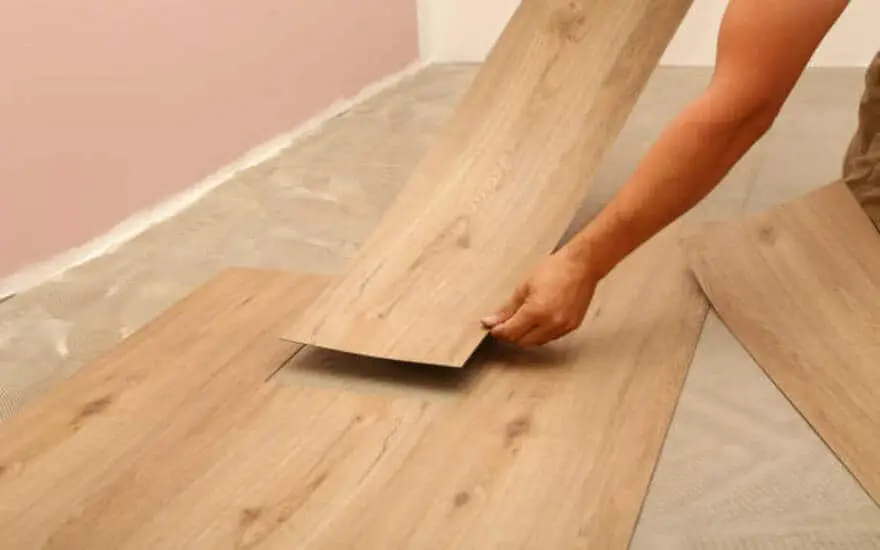
Remove Old bathroom floor vinyl
Removing old vinyl flooring is the first step in replacing your bathroom floor. The best form to vacate it is to use a pry bar to lift the edges carefully, then use a putty knife to scrape up the adhesive. Once you have removed the vinyl, you should also clean the subfloor to ensure that any remaining adhesive is removed.
Make sure to wear protective gloves and a mask while doing this to protect your skin and lungs from any residue.
Clean and Prepare the Subfloor
Before laying down the new vinyl flooring, you need to ensure the subfloor is clean and level. Start by sweeping up any dirt or debris. If you have existing flooring, like tile or linoleum, you must remove it before installing the new vinyl.
Once the subfloor is clean and free of any debris, check for any uneven areas. You may need to use a trowel to level out the subfloor and ensure it is flat. If the floor is particularly rough, you may need to use a self-leveling compound or a concrete patch to even it out.
Once the subfloor is clean and level, you can begin to lay down the new vinyl sheet. Make sure to follow the manufacturer’s instructions for the best results.
Layout the Vinyl Sheet
Once you have collected all the essential materials, removed the old vinyl flooring, and cleaned and prepared the subfloor, it’s time to lay out the vinyl sheet. Start by rolling out the vinyl sheet in the bathroom, ensuring that it covers the entire area. Make sure that the pattern is centered and straight. Trim any excess vinyl with a utility knife or scissors if necessary.
You may also need to cut out any holes for fixtures such as sinks, toilets, or showers. Once the vinyl sheet is laid out properly, use a notched trowel to apply the sealant onto the subfloor. Use the scoop to ensure the adhesive is spread evenly across the entire area you want to cover. Then, carefully place the vinyl sheet onto the adhesive and press it firmly into place. Finally, use a roller to ensure no air bubbles or gaps in the vinyl sheet.
Cut Vinyl Sheet for Installation
Once the vinyl sheet has been laid out and the measurements have been taken, it’s time to cut it. This step is best done using a sharp utility knife and a uncorrupted edge as a guide. Measure twice and cut once to ensure that the cuts are precise and accurate.
When cutting around obstacles like door frames, cabinets, and toilets, pay particular attention. Once the piece is cut, use a damp cloth to clean off any adhesive residue.
Adhere Vinyl Sheet to the Subfloor
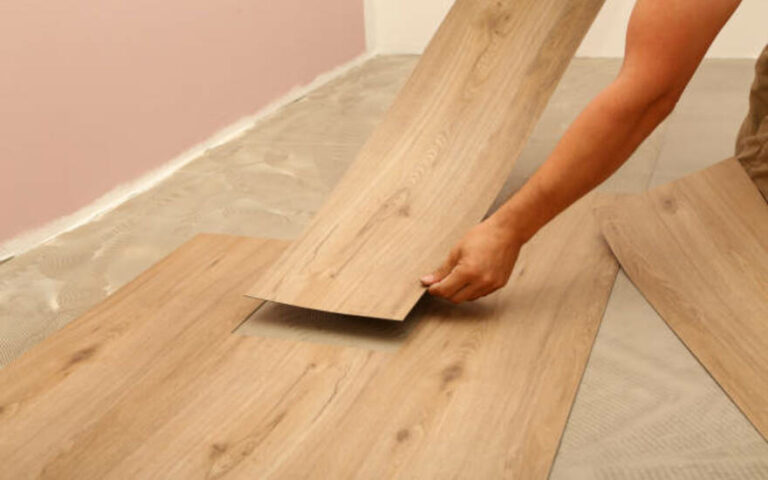
Once the vinyl sheet is in the proper position, it’s time to adhere it to the subfloor. Spread an adhesive with a notched trowel in small sections, ensuring that it is properly spread and that no air bubbles remain.
Carefully press the vinyl sheet down onto the adhesive, ensuring it is appropriately aligned. Re-roll the sheet and use a rolling pin to press it firmly into place. Pay close attention to the edges, as the adhesive must be sealed for a secure hold. Once the sheet is firmly in place, you can move on to the next step.
Cut Out Holes for Fixtures
Once you have laid the vinyl sheet, it’s time to cut out the necessary holes for any fixtures in the room, such as the toilet, sink, tub, or shower. Start by locating the fixture’s center and drawing a circle around it.
Then, use a sharp utility knife to cut out the hole and remove the excess vinyl. Make sure to leave a few inches of extra material around the hole for installation purposes. If you’re uncomfortable using a knife, you can also use a spot saw to cut out the area for a more precise cut. With the holes cut out, you can proceed to the next step and adhere the vinyl sheet to the subfloor.
Seal the Edges of the Vinyl Sheet
Once you have the vinyl sheet in place, it’s essential to seal the edges to prevent water from seeping underneath. This can be done with a vinyl sealant, which is easy to apply with a paintbrush. Make sure to coat the edges of the vinyl sheet several times to ensure a complete seal. After the sealant has dried, you can begin to install the transitions.
Install Transitions
Once you have the vinyl sheet, you will need to install transitions. Transitions are materials between two different flooring types, vinyl and tile. They help to protect the edges of the vinyl sheeting and provide a smooth transition between the two different types of flooring. Installing transitions is relatively easy and can be done using adhesive.
- First, measure the transition area and cut the transition to size.
- Then, apply an adhesive to the underside of the transition and press it into place. Make sure to wipe away any excess cement, and you’re done!
- After the transition, you can enjoy your new vinyl floor!
Clean Up and Enjoy Your New Vinyl Flooring
Now that you’ve gone through all the steps to replace your bathroom floor vinyl, it’s time to enjoy the fruits of your labor. Before you can do that, however, a few final tasks need to be completed. First, vacuum up any excess dust or debris from the installation process and then use a damp cloth to clean the floor thoroughly.
This will help ensure that your new vinyl flooring stays in excellent condition for years. Once you’ve given it a good cleaning, you can sit back, relax, and enjoy the new look of your bathroom!
Do you have a vinyl floor in your home?
If you have a vinyl floor in your home, you may be considering replacing it with new vinyl flooring. Vinyl floors are easy to replace and can be done in just a few hours. It’s essential to ensure you have the necessary materials and tools before you begin. This includes adhesive, a trowel, a utility knife, and a pry bar. Once you have your materials, you can start withdrawing the old vinyl and establishing the new one.
How do you glue vinyl floor tiles together?
To properly install vinyl flooring, you will need to use an adhesive that helps to hold the tiles in place. There are a few different styles of bonds available on vinyl flooring, but the two most popular are vinyl-backed adhesive and pressure-sensitive adhesive.
The vinyl-backed adhesive is a water-based adhesive that requires you to spread it across the back of your vinyl tiles with a notched trowel. This adhesive gives you the most flexibility in positioning the vinyl tiles, as you can make adjustments before the adhesive sets.
On the other hand, pressure-sensitive adhesive requires you to apply the glue directly to the subfloor and then place the vinyl tiles on top. This adhesive is easier to use but is less adjustable than a vinyl-backed adhesive.
Regardless of which type of adhesive you use, you should always make sure that you follow the manufacturer’s instructions when installing vinyl flooring. This will ensure that your new floor is installed correctly and will help prevent any issues down the line.
What is the best way to soften tile adhesive?
Tile adhesive is a type of glue used to adhere tiles to surfaces. It is usually made from cement, sand, and water and is strong enough to hold the tiles in place for years. However, sometimes tile adhesive can be too hard to work with. This can make it difficult to cut, shape properly, and lay tiles. Fortunately, there are a few forms to ease tile adhesive so that it is easier to work with.
One of the most standard procedures is to employ a warmness gun or hair dryer to soften the adhesive. This will warm the adhesive, making it pliable and easier to spread. However, it’s essential to be careful not to overheat the sealant as this can reduce its effectiveness.
Another option is to use a chemical softener. These are available in liquid or paste form and are designed to soften tile adhesive. They are usually applied directly to the adhesive with a brush or roller and left to sit for a few minutes before the adhesive can be worked with.
How to soften the adhesive on the tile?
There are a few additional forms you can use when it comes to softening adhesive on a tile. The most common method is using a heat gun to heat the glue and soften it. This method is often used when removing tile from walls or floors. You can also use a chemical stripper to soften the adhesive. This method is often used when removing vinyl flooring.
Finally, you can use a combination of both heat and chemical strippers. Whichever way you choose, you should always take safety precautions when working with adhesives.
Summary
Gather up the necessary materials and tools, remove the old vinyl flooring, clean and prepare the subfloor, layout the vinyl sheet, cut the vinyl sheet for installation, adhere the vinyl sheet to the subfloor, cut out holes for fixtures, seal the edges of the vinyl sheet, install transitions, and clean up. Additionally, if you are having trouble with adhesives or tile softening, you can use a heat gun to soften the glue and a damp cloth to remove any residue. Your new vinyl floor can last for years with the proper steps and materials.

